

Connect Your Custom Domain
Set up DNS records in Outbound to host your landing pages on your own domain.
By default, your landing pages are hosted on a free yourbusiness.outbound.page
address. To run them on your own domain instead — like go.yourbrand.com —
you connect the domain by adding two DNS records. Here's how. It only takes a
few minutes, and if DNS is new to you, the What Is DNS?
guide covers the basics.
The short version: In Outbound, go to Settings → Landing Page Hosting → Connect Domain, enter your domain, add the two DNS records it gives you at your domain provider, and click Verify DNS. Once it's verified, our team deploys your landing pages to your domain.
Open Landing Page Hosting
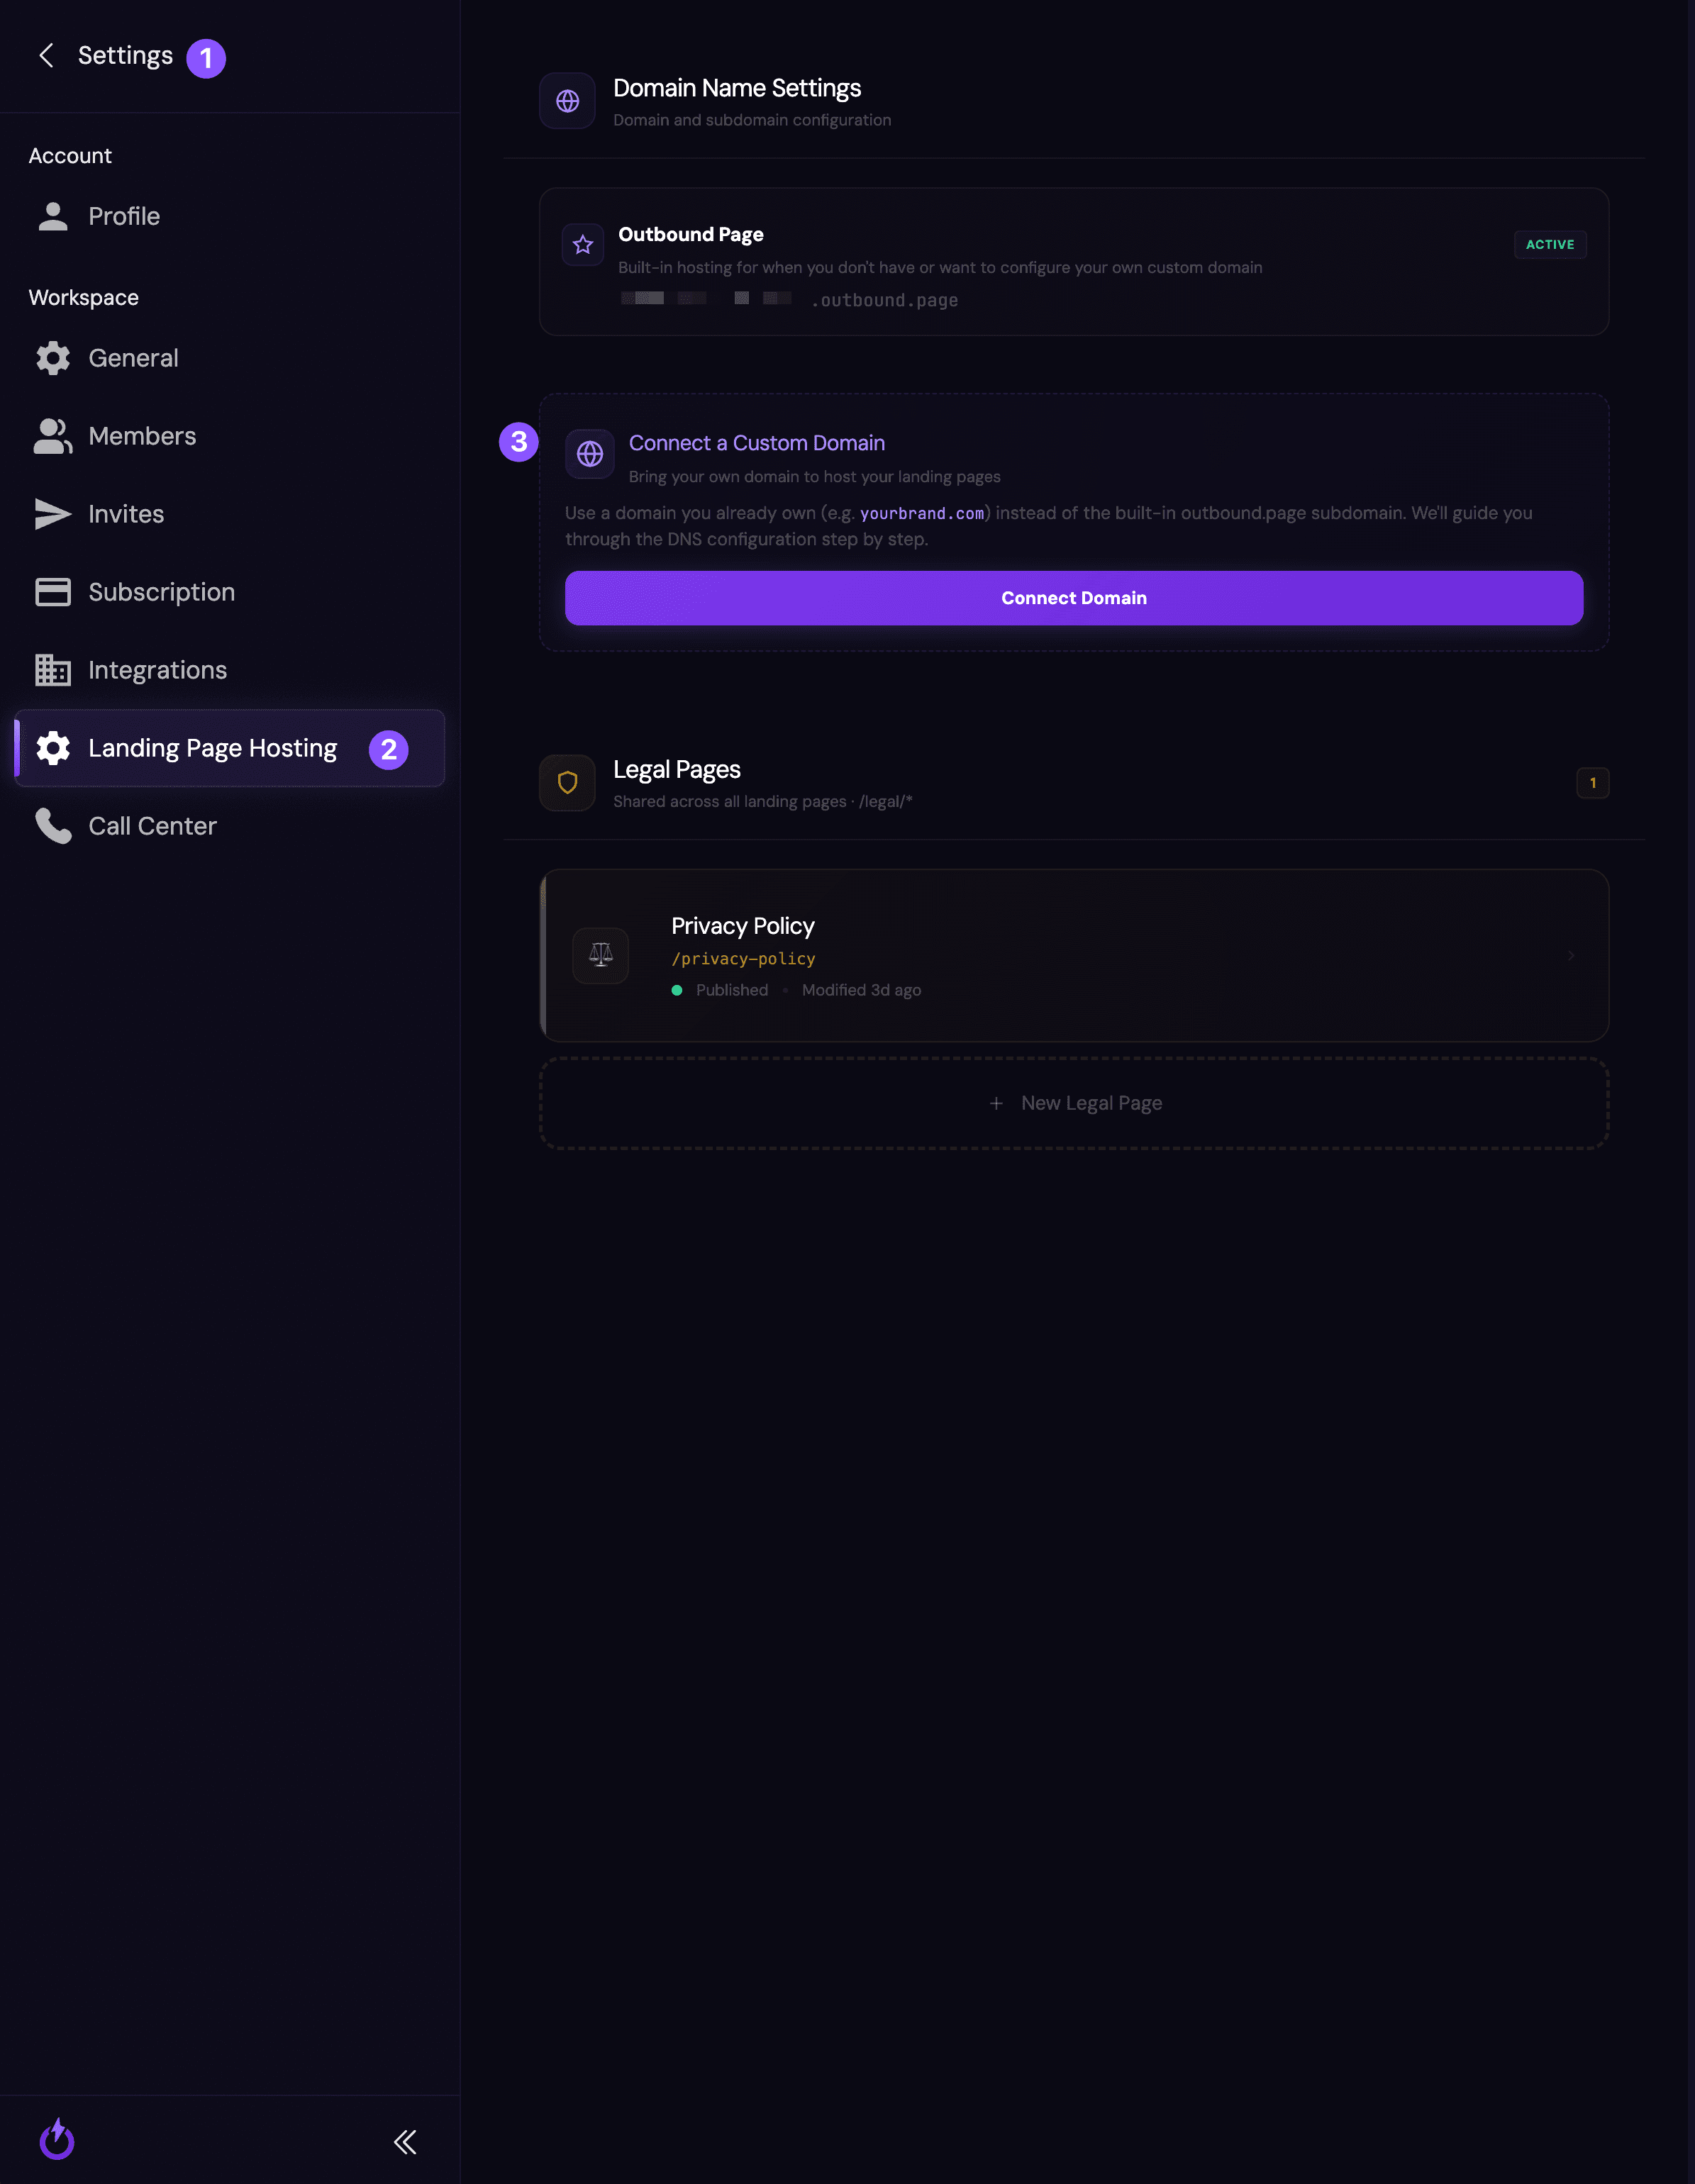
Open your Workspace Settings, then select Landing Page Hosting (2). Under Connect a Custom Domain (3), click Connect Domain.
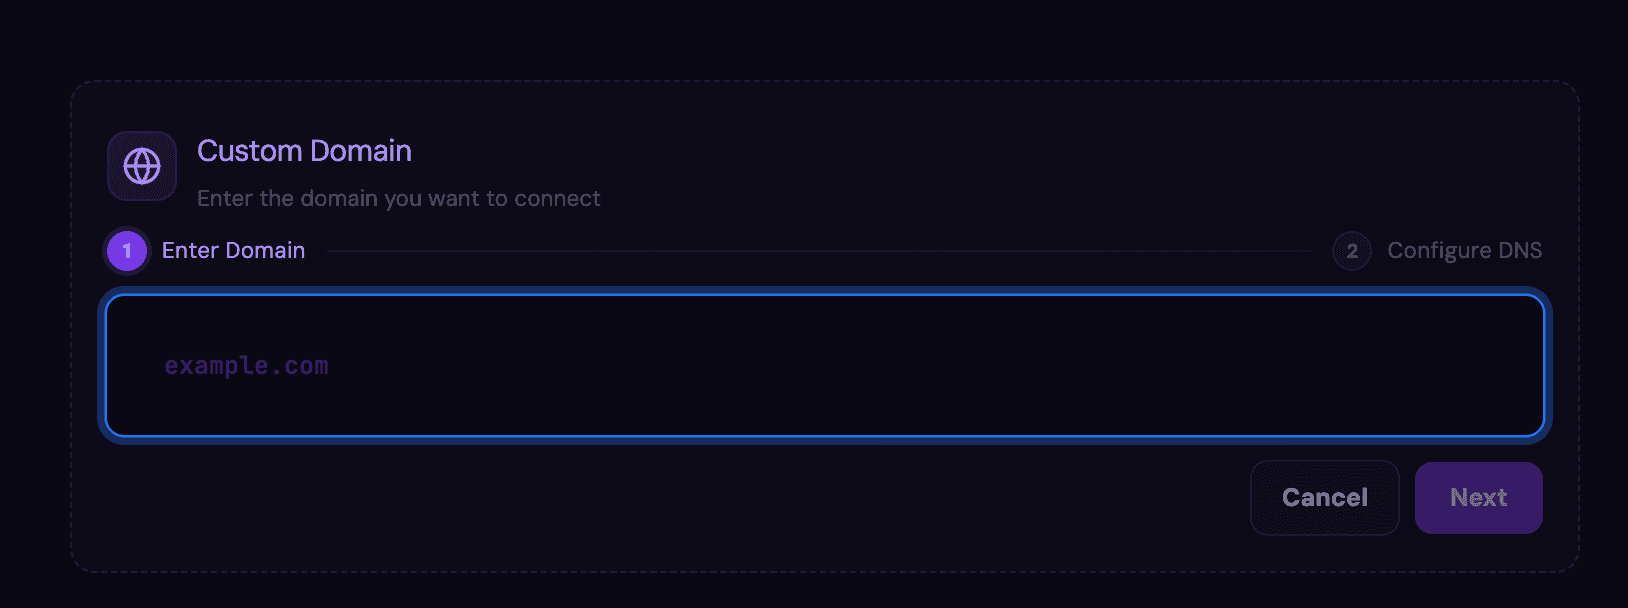
Add the two DNS records at your provider
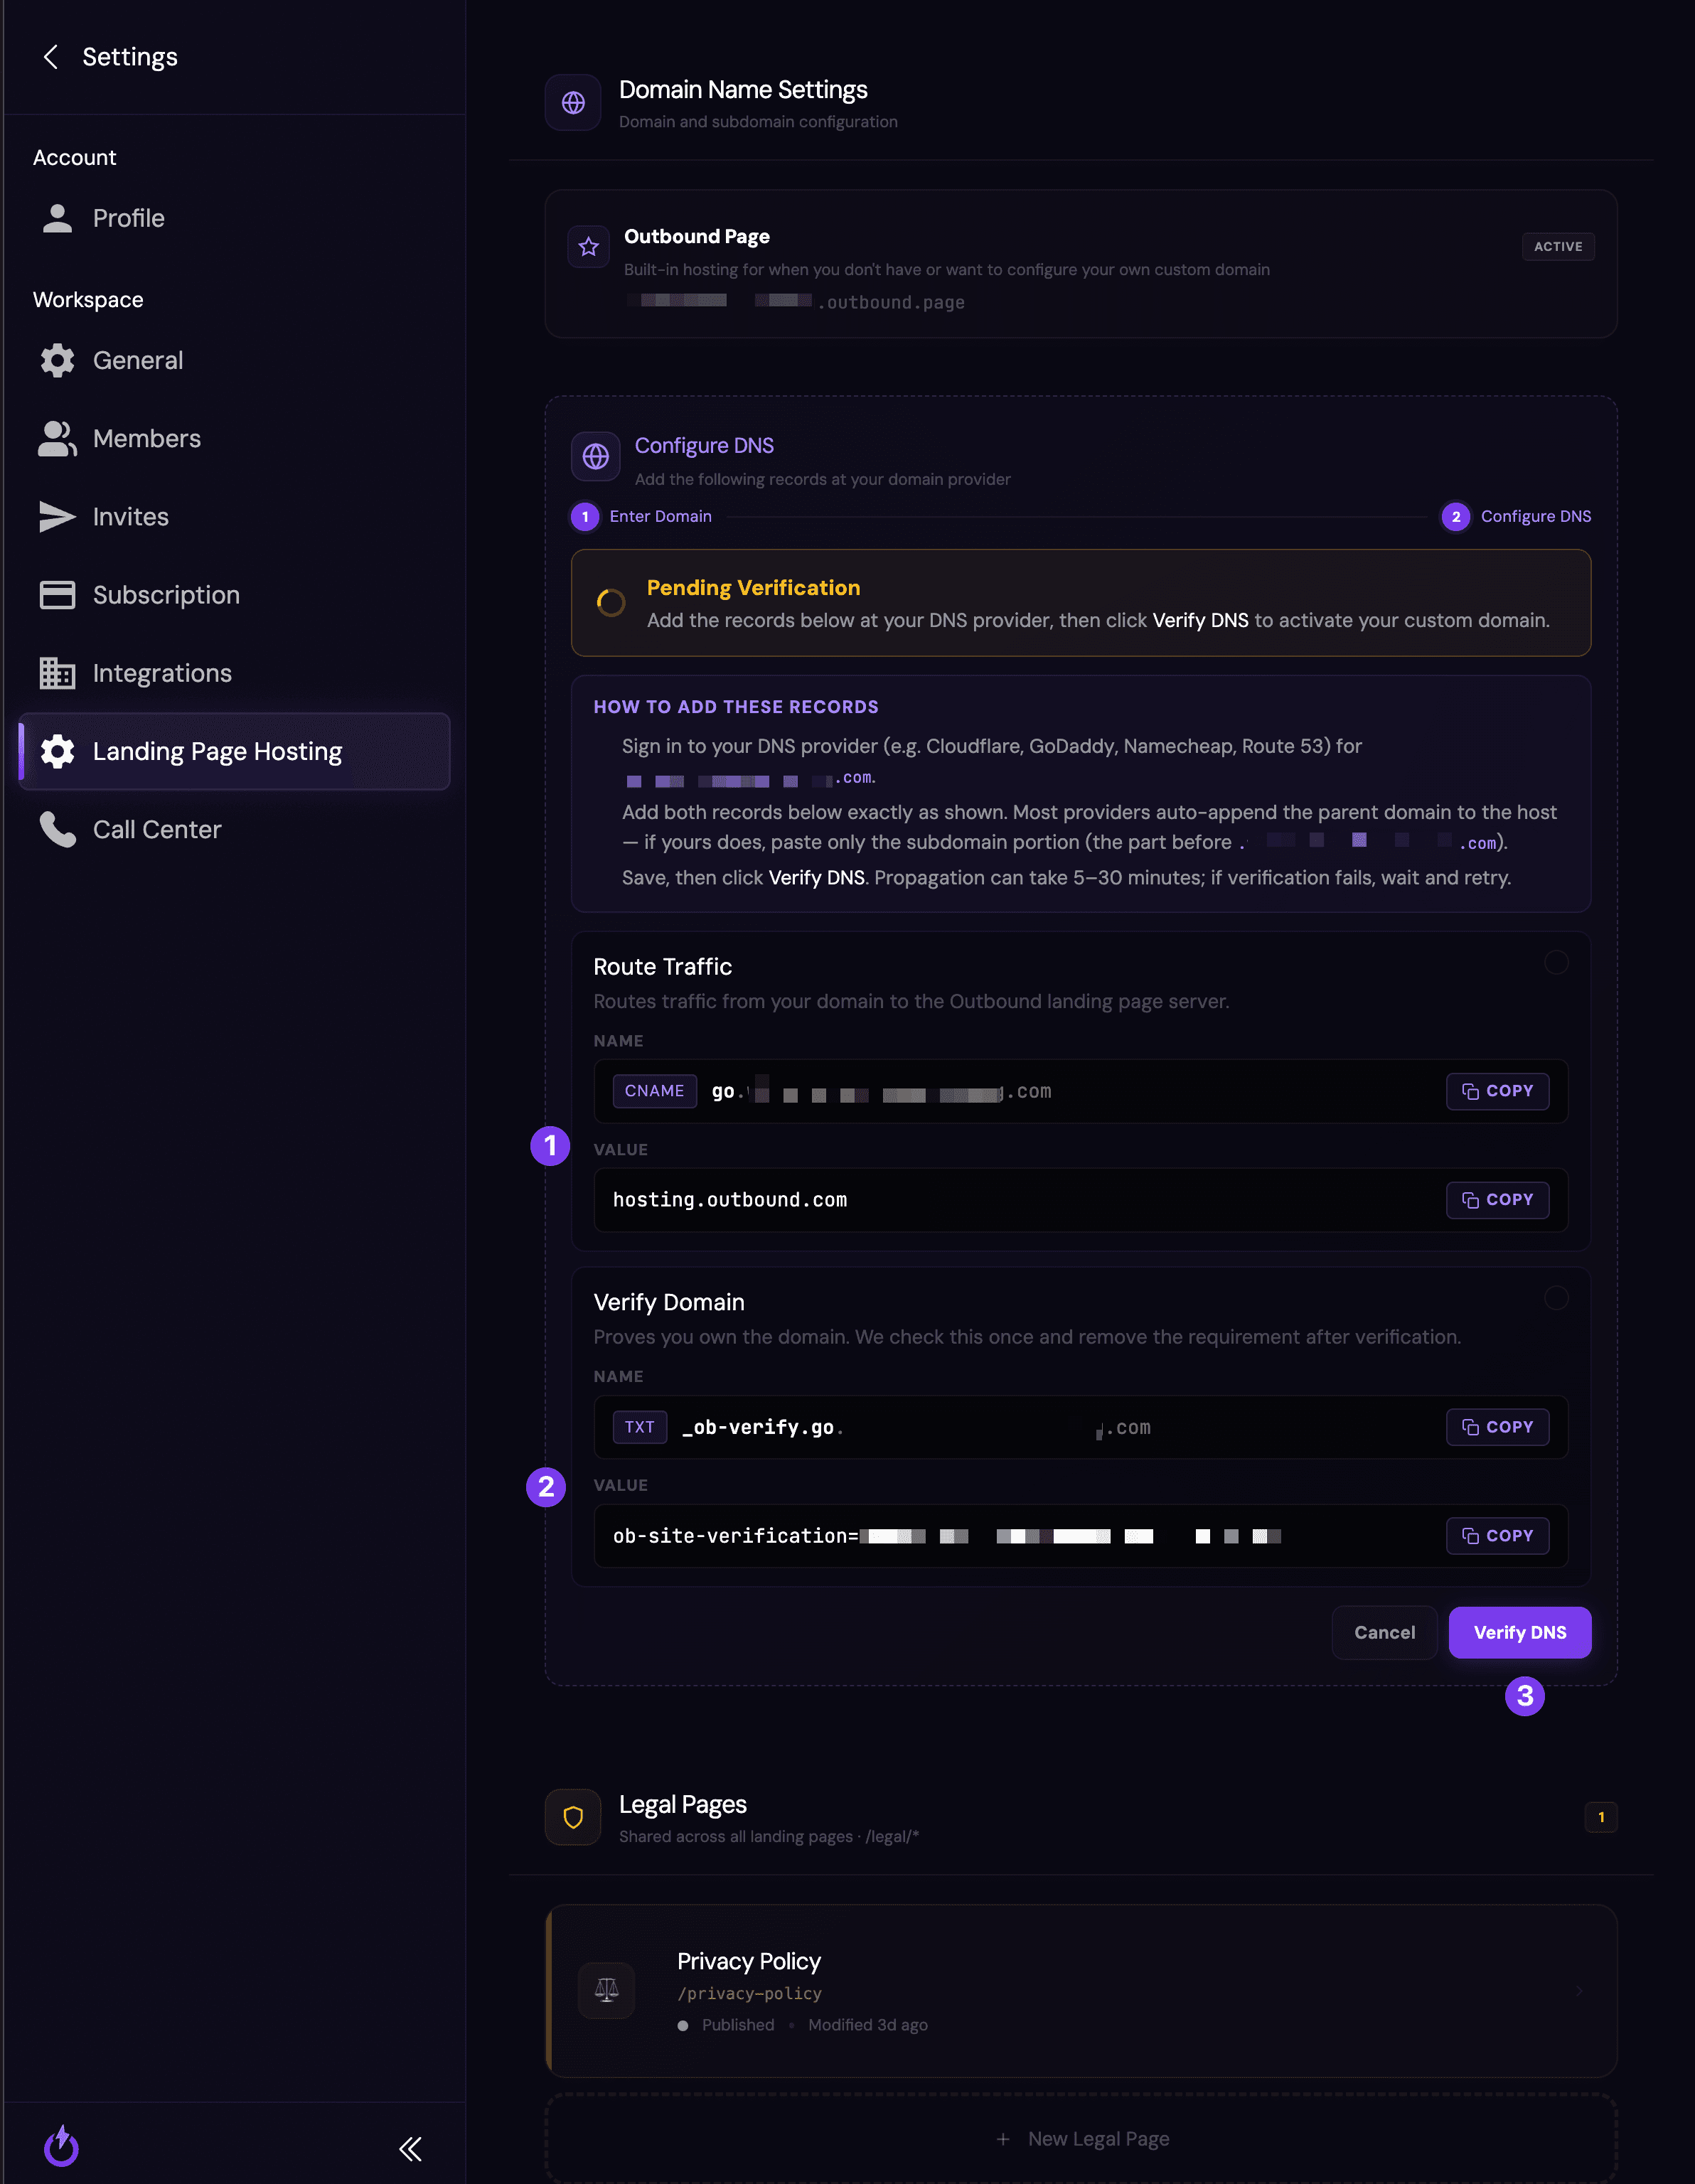
Outbound shows you two records to add at your domain provider (Cloudflare, GoDaddy, Namecheap, and the like):
- Route traffic (1) — a CNAME record that points your subdomain (like
go.yourbrand.com) tohosting.outbound.com. - Verify domain (2) — a TXT record that proves you own the domain.
Use the Copy buttons to copy each Name and Value exactly, add both records at your provider, and save. Most providers automatically add your domain to the end — if yours does, paste only the part before your domain. Then click Verify DNS (3).
DNS changes take time to spread — usually 5–30 minutes. If verification fails right away, wait a few minutes and click Verify DNS again.

What happens next
Once your domain is verified, the Outbound.com team deploys your landing pages to your own domain and updates your ads to point at it — so your campaigns run under your brand.
Still stuck?
Stuck on a DNS record, or not sure where your domain is managed? Send us your domain and we'll walk you through it.